

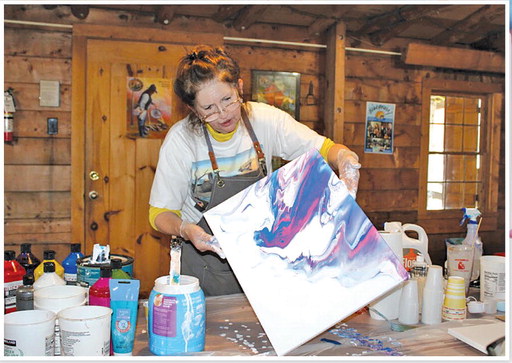
Acrylic pour art classes stand as a popular social media sensation ideal for those who don’t exactly have the best artistic skillset, particularly drawing. Former elementary teacher and now painter Julie Majek led her Jan. 25 class through the entire acrylic art process, from mixing the base paints to creating cells, to different pour methods you can try in your own home.
“I used to teach children, now I love teaching adults,” Majek said at the session at the AgriCultural Museum and Arts Center. “Acrylic pour paints are the perfect gift for loved ones or to place in your own home.”
Acrylic paint pour is exactly what it sounds like, but what you may not know is that before you place all the colors you want on the canvas, you need to apply a white coat – yes, even if the canvas itself is white.
Majek used four parts Behr premium interior satin enamel water- based paint, one-part-stained flood (floetrol), and half-part water. While Michael’s can provide some of the supplies, Majek suggested going to local paint shops first.
After creating the base coat, it’s time to mix with the desired pigments. The concoction should be 50% flood and 50% Liquitex acrylic pouring medium. “Puddle paint” — the paints you select to be the color pops on your canvas — should be one-part tube paint and five-parts of pouring medium.
“You don’t need a lot of the color for it to show on the canvas,” Majek said. “Also remember that when choosing your colors, pick only two primary colors. Otherwise the color will get muddied quickly.” If using red, she said to make sure it doesn’t take up more than 5% of the canvas “because it’s such a dominant color. Three colors is ideal, it’s plenty to work with.”
At this point, it’s time to start the pour.
Start with the base color and spread the white coat across the canvas as much as possible. Majek said to make sure to have a drop cloth underneath because paint-pouring can get messy quickly.
After applying the base coat, Majek introduced the “cup method.” After filling a Solo cup with the first puddle paint, students flip the cup on the canvas and move the cup across the canvas. To add paint cells, Majek suggests using 5-10 drops of DecoArt Fluid Art Ready to Pour Acrylic Cell Medium. This allows use of a brush or scraper to create different effects.
A second method is known as the “blow dryer method.” The cup is still used, but the artist doesn’t spread it around the canvas. Instead, a blow dryer is used, on cool setting, to blow the color throughout the canvas.
Local artist Rhonda Winer, no stranger to acrylic paint pour artistry, was excited to see the different methods of spreading the color across the canvas.
“I can’t do the blow dryer like she does,” Winer said, adding that her friend, Susan O’Neil, was new to the art world.
“She makes it look so easy,” O’Neil said of Majek’s demonstration. “I hope mine comes out decent. I’m excited to try it.”
If you’re interested in attending art workshops at The AgriCultural Museum and Arts Center, classes of different art styles are constantly offered. Visit the website hccarts.org/mini-workshops/ to sign up for a class.
Majek’s next acrylic pour paint class is scheduled for May 3.


Comment
Comments